

It's no secret that Google Fonts have become immensely popular. Many Ghost Themes come preloaded with these fonts, presenting a challenge due to the General Data Protection Regulation (GDPR) implications surrounding Google Fonts. A recent ruling by a German court has shed light on the issue. Websites embedding Google Fonts may be in violation of GDPR because Google records the user's IP address when the browser requests a font, subsequently utilizing it for analytical purposes. To ensure GDPR compliance for my Ghost blog, I was faced with two choices: completely abandon Google Fonts or take the self-hosting route.
In this article, I will delve into the second option and guide you through the necessary steps to use Google Fonts in a GDPR-compliant manner on your Ghost blog. We'll cover everything from removing Google font requests to downloading the font files, generating CSS rules, and seamlessly integrating them into your website. Even Google itself has a short article explaning how to self-host Fonts .
By following my steps, you can embrace Google Fonts while ensuring respect for user privacy and GDPR compliance in your Ghost blog. Let's dive in and reclaim control over our font choices without compromising data protection.
Checking for Google fonts request
To check for Google fonts, I use Safari's Develop menu. We start by enabling the Develop menu in Safari's preferences.
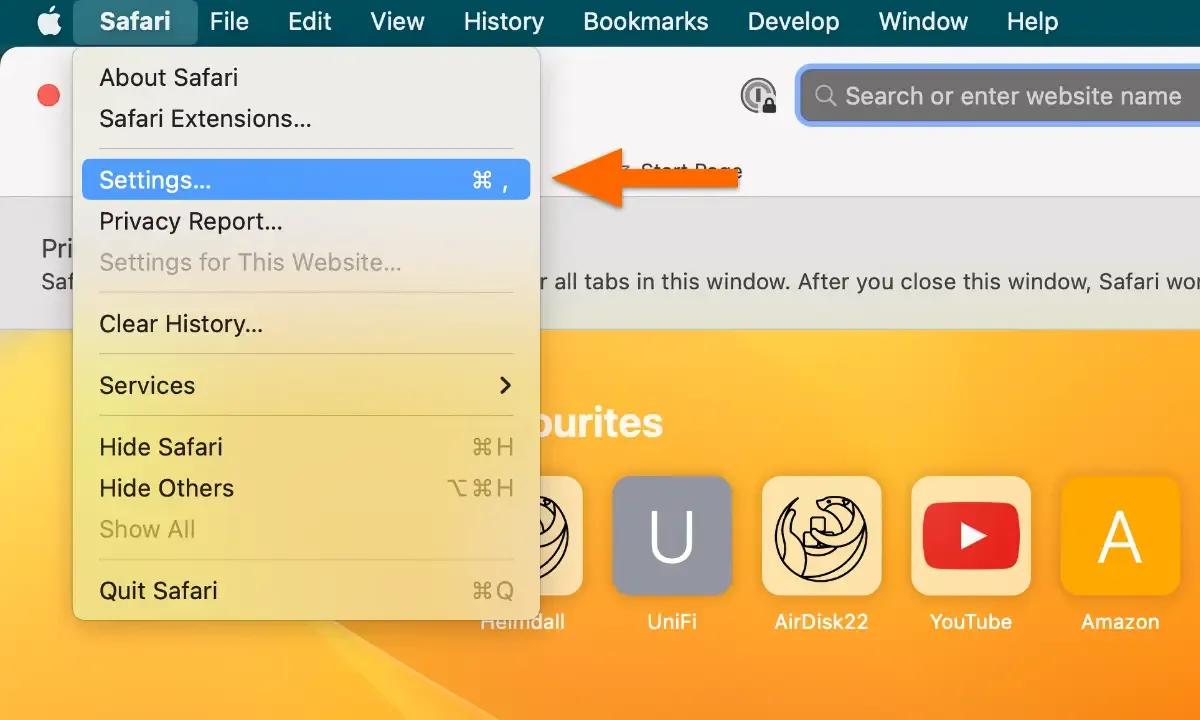
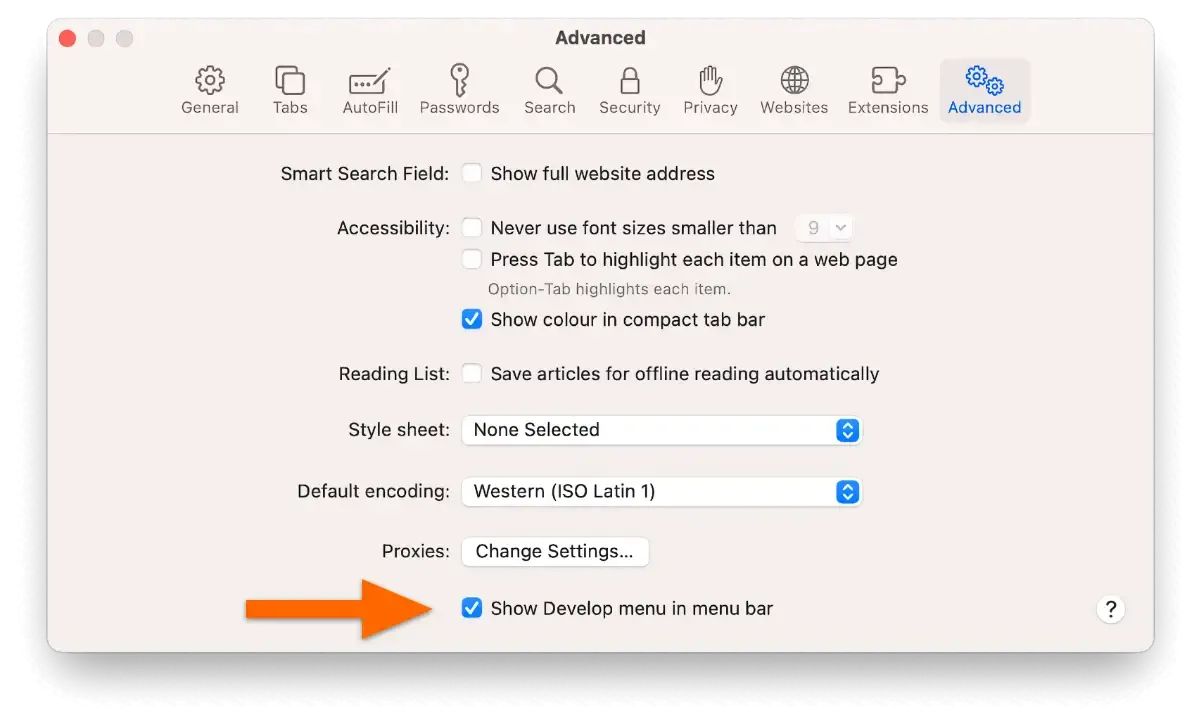
Steps to enable the Develop menu in Safari's preferences
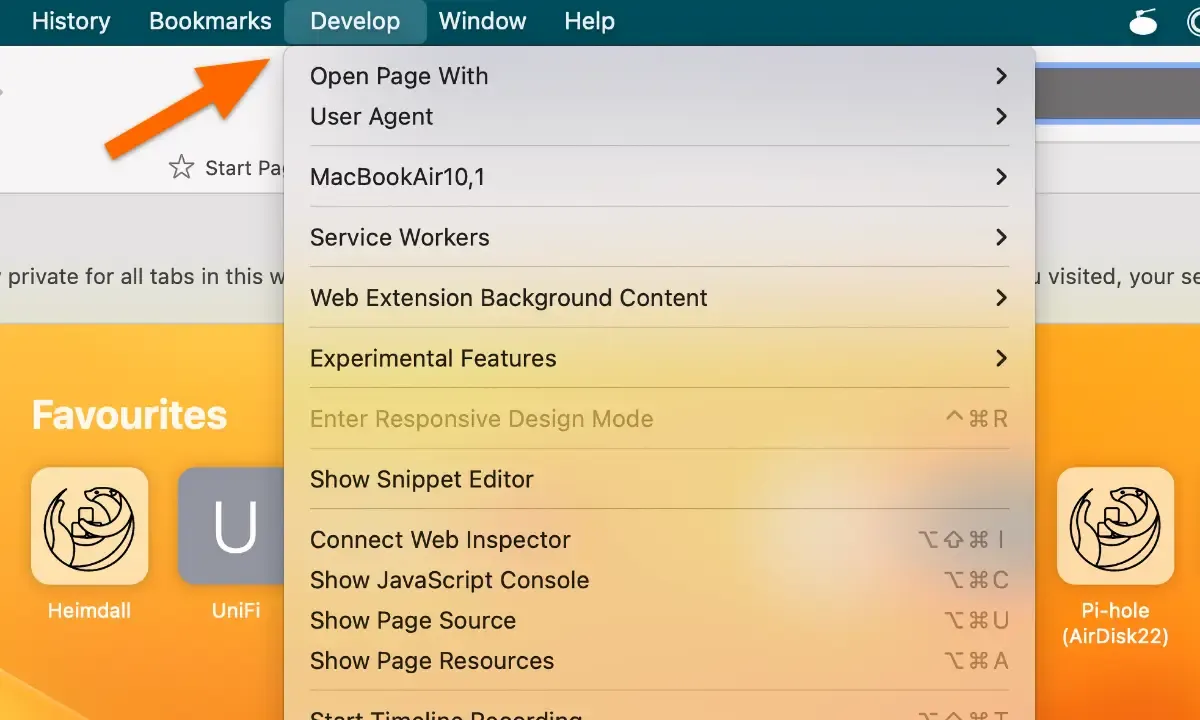
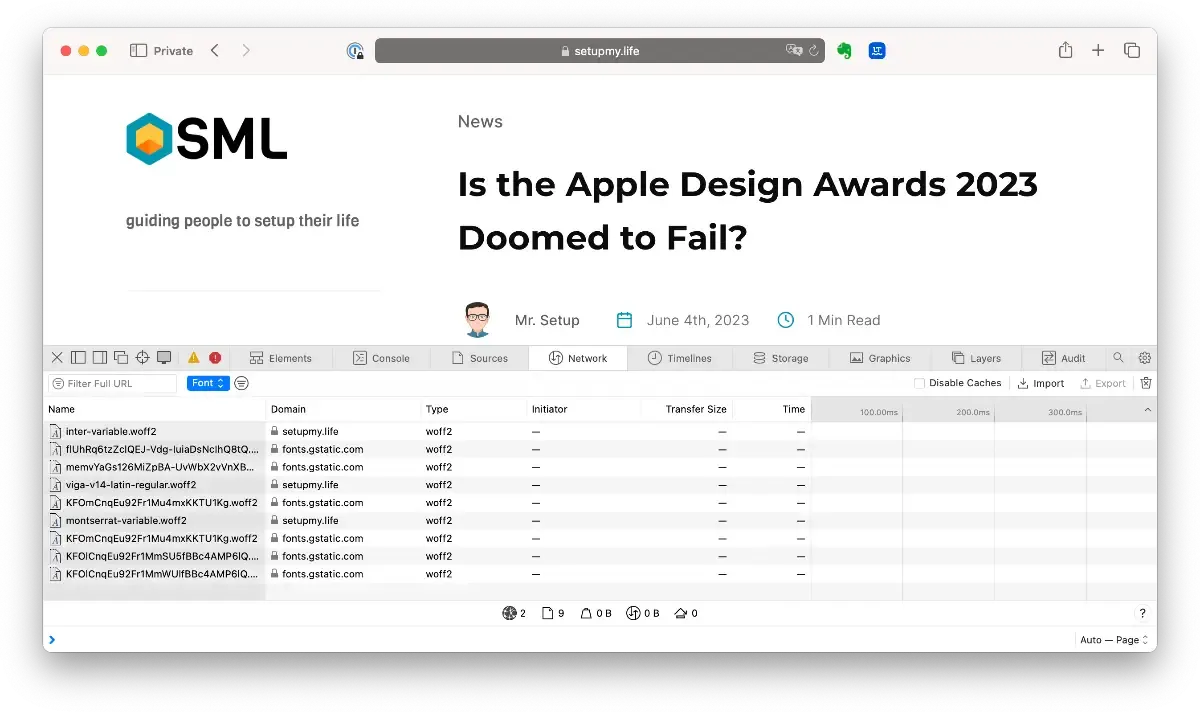
Once enabled, navigate to the website we want to examine and open the Develop menu. Choose "Show Web Inspector" or press Command + Option + I. In the Web Inspector window, switch to the Network tab and filter for Font. We look for requests that reference fonts.googleapis.com or fonts.gstatic.com. If there are requests to these domains, it is clear that the website is utilizing Google fonts.
Removing Google font requests
- Locate and Remove the Google Fonts Code
Next, we'll need to find the code responsible for fetching Google Fonts. Typically, it appears as something like:
<link rel="preconnect" href="https://fonts.googleapis.com">
<link href="https://fonts.gstatic.com" crossorigin>
<link href="https://fonts.googleapis.com/css2?family=THEFONTUSED">
Search for the code within the theme's files. The most common location is the default.hbs file. If it's not there, explore the theme directory for a file named fonts.g. Once found, we remove the <link> elements or comment it out using the <!-- and --> tag before and after the code.
- Verify the Absence of Outgoing Requests
After removing the<link>elements, it's important to ensure that the Ghost blog no longer generates outgoing requests to Google's servers. To verify this, we use the Developer Tool of our browser again. If everything worked, there should be no outgoing requests related to fonts in the Network tab.
Download the font files
Now that we have successfully removed outgoing requests to Google servers from our Ghost blog, you may notice that the fallback fonts, typically browser defaults, are now loading. But fear not! Since we still wish to maintain the same look and feel, it's time to take the next step and self-host the fonts.
- Download the Font Files
Start by visiting fonts.google.com and search for the desired font family. Once we've selected the appropriate styles or font weights, click on "Download all" to obtain the font files in a convenient zip format.
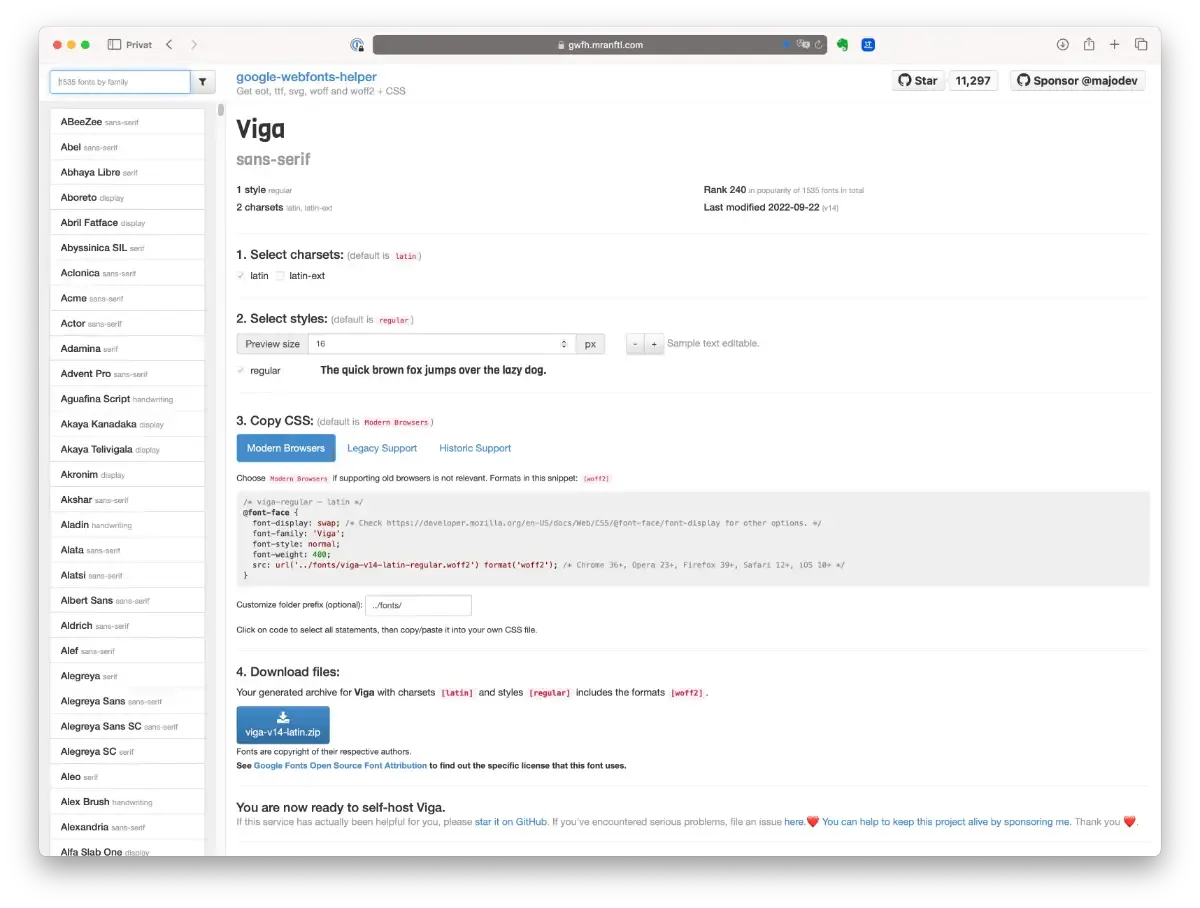
Alternatively, I used a helpful tool called google-webfonts-helper by the awsome Mario Ranftl .
- Place the Font Files in the Ghost Theme Folder
After downloading the font files, it's time to integrate them into our Ghost theme. The recommended location for storing these files is theassets/fontsdirectory. If the fonts directory doesn't exist, simply create it within theme.
- Ready to Self-Host the Fonts
With the font files securely placed in our theme'sassets/fontsdirectory, we are now prepared to self-host the fonts. This means the Ghost blog will load the fonts directly from our own server, eliminating the need for external requests and preserving GDPR compliance.
Generate the CSS rules
When it comes to using custom fonts, defining the @font-face rules is essential. These rules specify the custom font to be used for displaying text. While the default integration of Google fonts handles this automatically, self-hosting requires a more hands-on approach.
Fortunately, there's the convenient tool I mentioned earlier google-webfonts-helper that can generate these rules for us. You can find the project on GitHub . Let's explore the step-by-step process:
-
Select Charsets and Font Weights
Begin by selecting the desired character sets for your fonts. The default option is Latin, but you can choose additional character sets as needed. Next, select the font weights or styles that you want to include. -
Copy the Generated CSS
The tool will generate the necessary CSS code for modern browsers. Copy this CSS code, as it will be used to define the@font-facerules in your theme. -
Download and Place Font Files
As mentioned earlier, ensure that the font files downloaded from the tool are placed in the appropriateassetsdirectory of your Ghost theme. Organizing the font files correctly is crucial for the fonts to function properly.
Adding the CSS rules
When it comes to integrating custom fonts into your Ghost theme, you have two options: adding CSS either directly into a CSS file or utilizing the convenient Code Injection area in Ghost Admin. Let's explore an example to understand the process better.
Let's say I want to integrate the Viga font. After selecting the desired style and downloading the font files, I have the following font file located in the /assets/fonts directory:
- viga-v14-latin-regular.woff2
Additionally, I have the following CSS rules:
/* viga-regular - latin */
@font-face {
  font-display: swap;
  font-family: 'Viga';
  font-style: normal;
  font-weight: 400;
  src: url('/assets/fonts/viga-v14-latin-regular.woff2') format('woff2');
}
Now, I'll add these font rules inside a <style> tag in the code injection area. With this step completed, the last task is to ensure that the website uses the correct font. Although the implementation may vary depending on your theme, adding the following rule in the code injection area should do the trick:
body * { font-family: 'Viga'; }
That's it! We have successfully self-hosted Google Fonts within our Ghost theme. By following these steps, we have taken full control of our blog's visual identity while adhering to GDPR compliance.
If you have any questions or want to share your own font integration experiences, feel free to leave a comment or reach out. Let's continue exploring new ways to enhance our blogs together!